
From the field.
From the bench.
The research, the preparation, and what the evidence actually supports. Follow the work here, without the group politics.
A rough find isn’t the whole story.
A damaged-looking fossil can still become a striking specimen. Good preparation brings out the form, detail and character that are easy to miss in the rough.
This Flexicalymene retrorsa looked battered, with much of its enrolled shape still held in the rock. After preparation, the curved shell and exposed crystalline interior become the focus. The break hasn’t disappeared—it’s no longer the only thing you notice.
Listen: a one of one
Open audio separatelyAI-generated narration using a cloned voice. Playback is optional.
Read audio transcript
This Flexicalymene had taken a beating long before I found it. Whether the damage happened during burial or from shearing forces later on, it certainly didn’t look like a prize sitting in the rock.
From the top, you could barely make out its shape. I think most people would have passed it over. I nearly did—but something made me take a second look.
That’s when I saw it. Calcite filling the inside of a roller. An enrolled trilobite with its crystalline interior exposed.
Right then, I knew I had to prep it. And I knew exactly where it was going: into my private collection.
As the surrounding rock came away, you could finally appreciate what was there. The curve of the shell, the enrolled shape, and those crystals inside. The damage hadn’t gone anywhere. Preparation just gave you something more to look at than the break.
You can find pristine prone specimens and beautifully preserved enrolled ones. I love those too. But a fossil doesn’t have to be perfect to earn a place in the collection.
Sometimes the one you almost leave behind is the one you couldn’t replace.
And this one is always going to be a one of one.
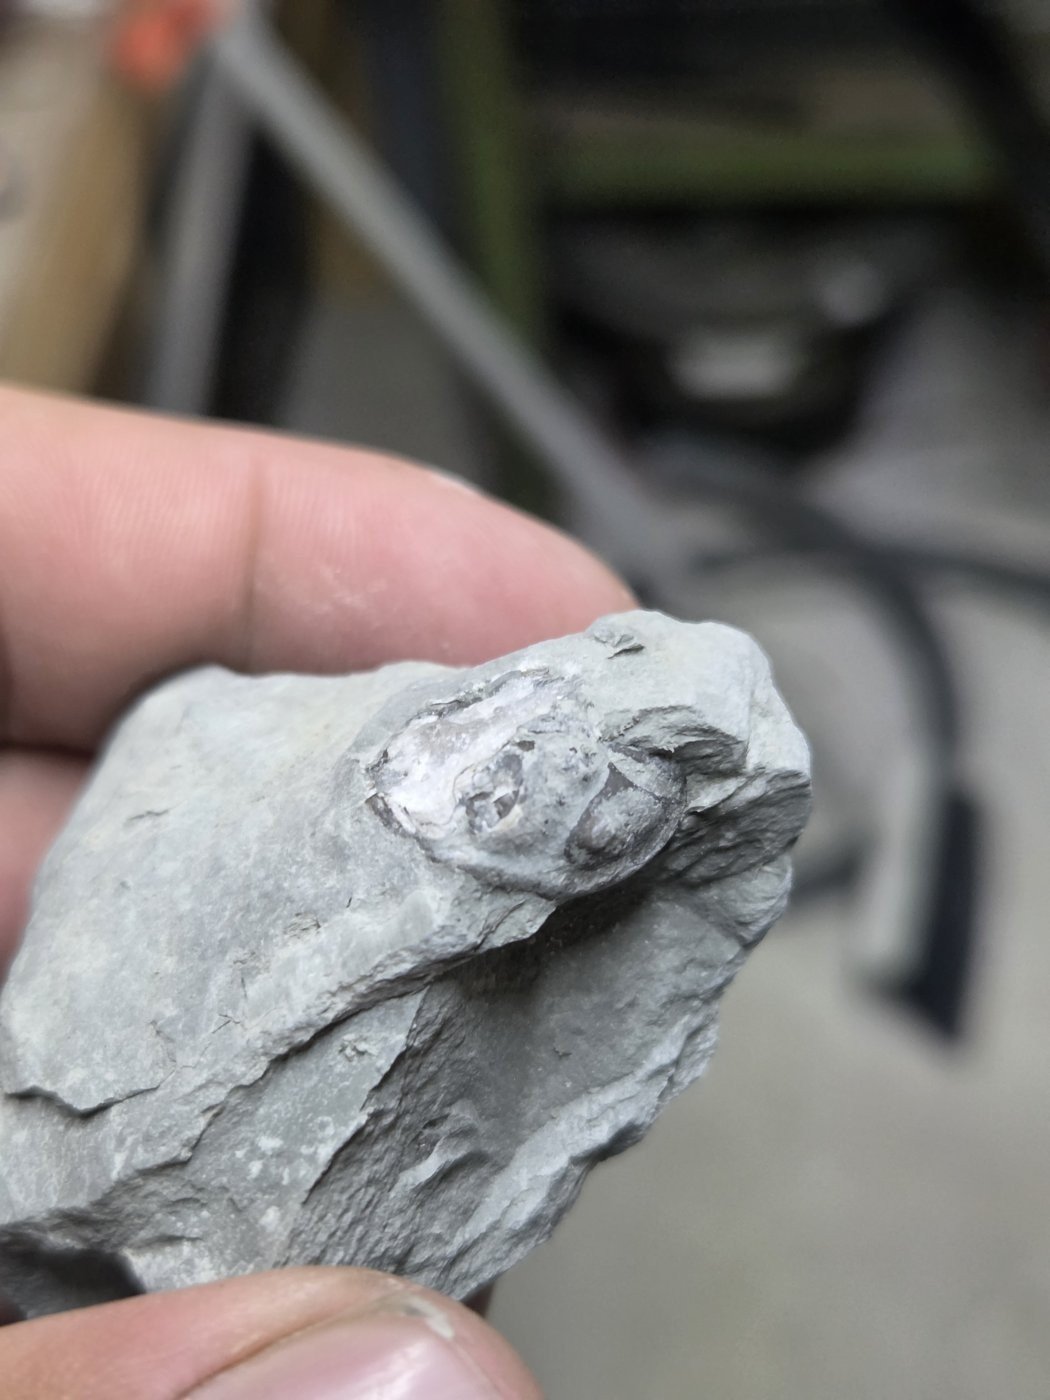
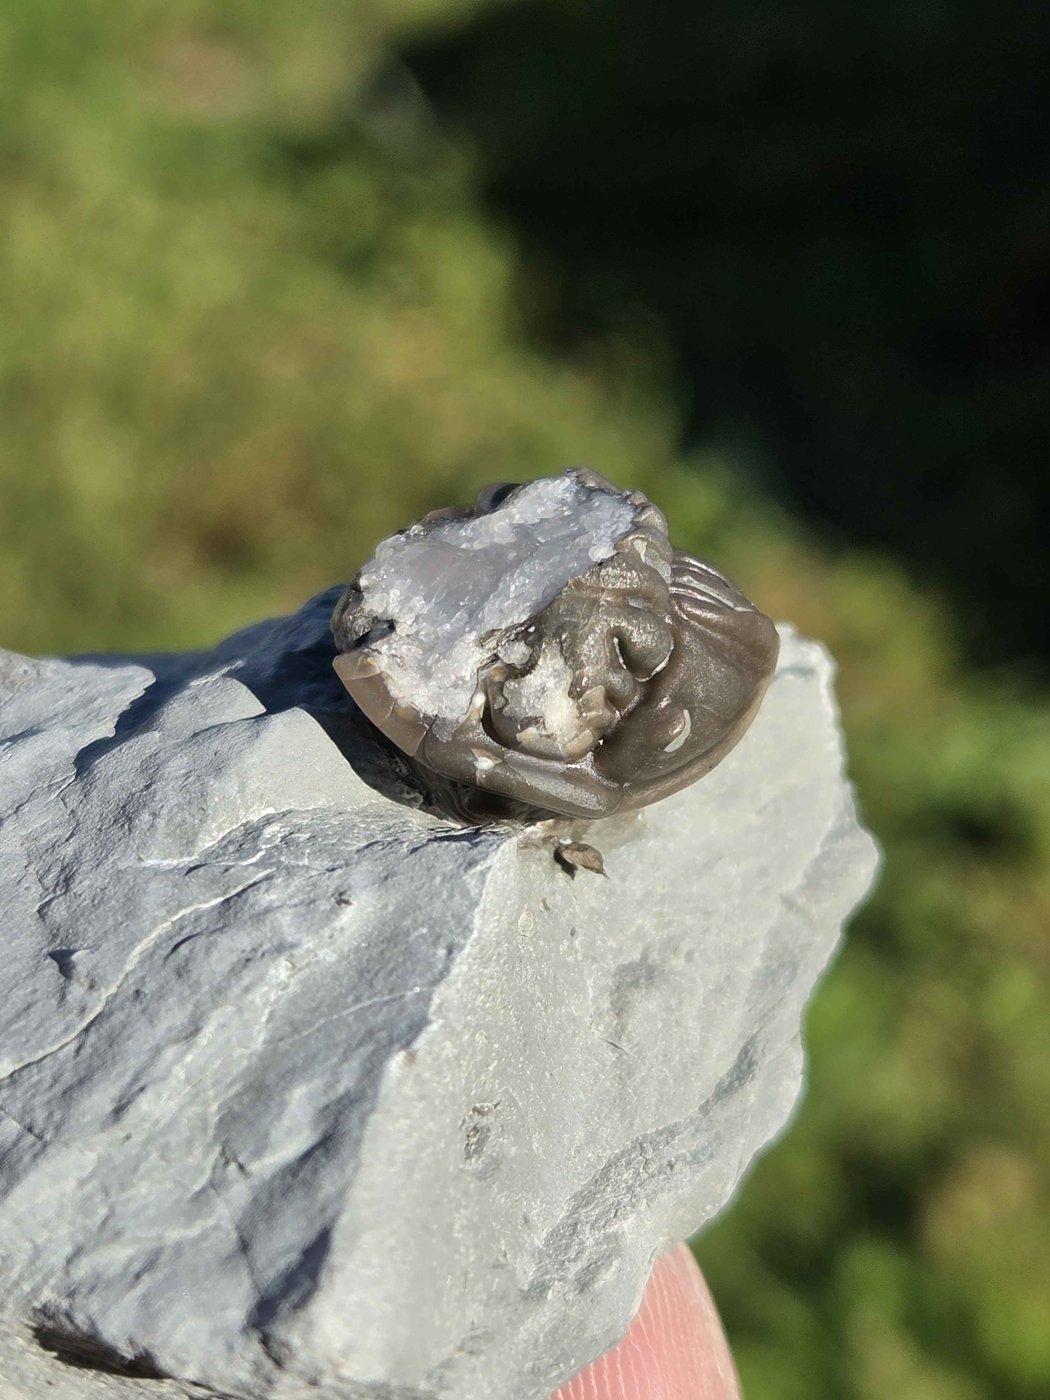
Not every worthwhile fossil starts out looking like a display piece. Sometimes the prep is what lets you see what was there all along.
From nodule to finished fossil
A few exposed segments give you a reason to keep looking. These photographs follow the preparation from the raw nodule to the finished trilobite.
- Raw nodule
- Air scribe
- Air abrasive
- Matrix shaping & landscaping
- Finished fossil
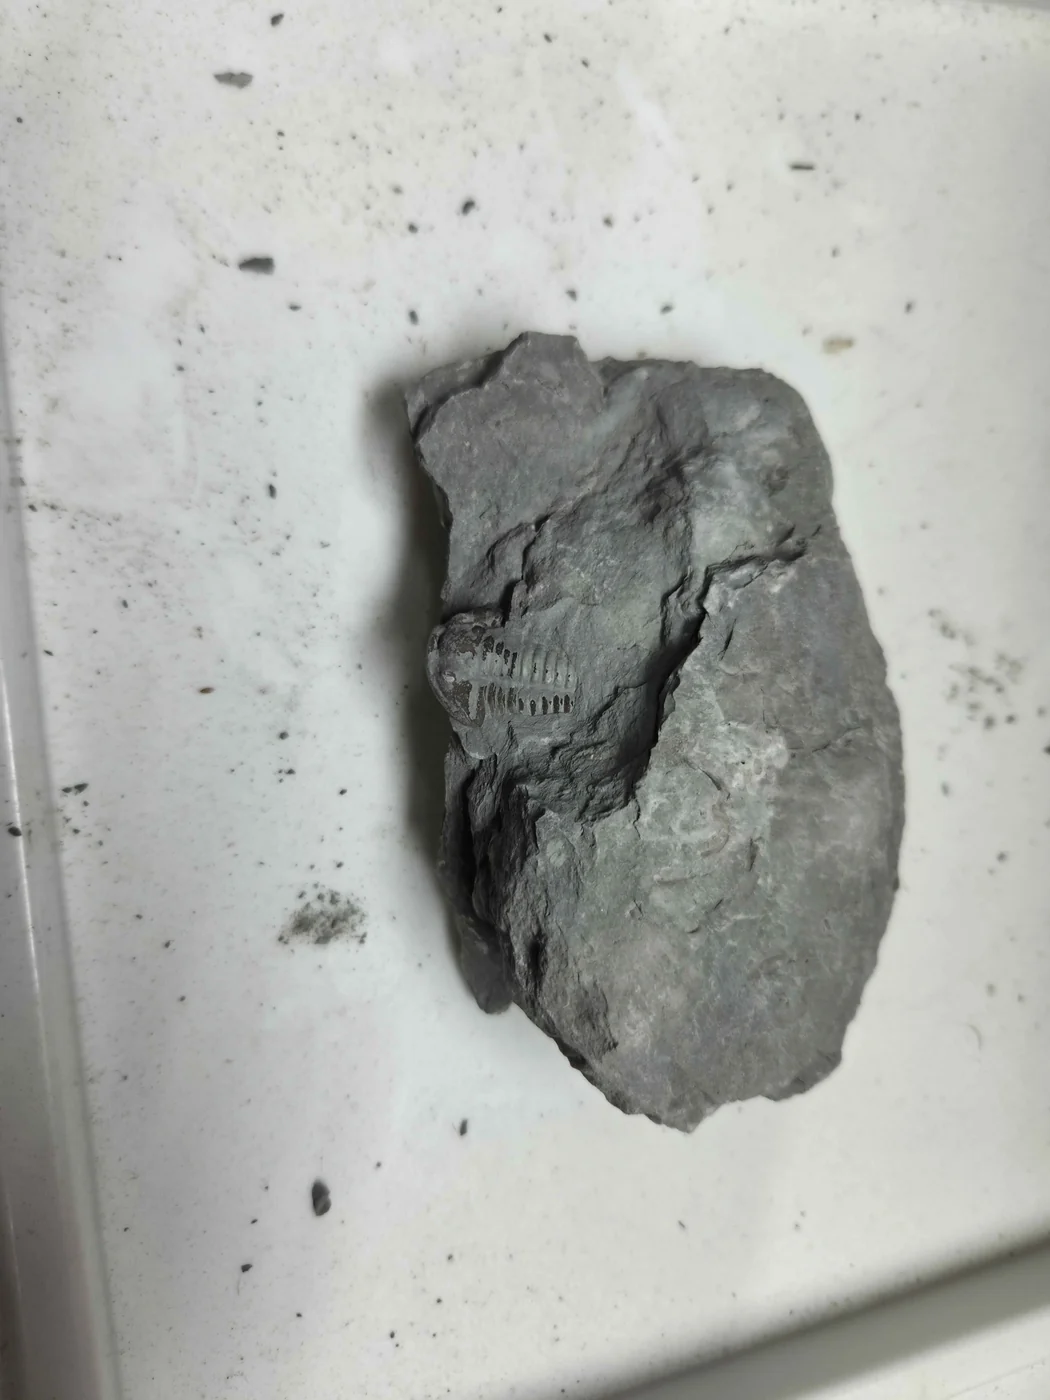
A few ribs in the rock
Most of the fossil is still enclosed in the nodule. A small patch of segments is visible at the edge.
Read audio transcript
Most of the fossil is still enclosed in the nodule. A small patch of segments is visible at the edge.
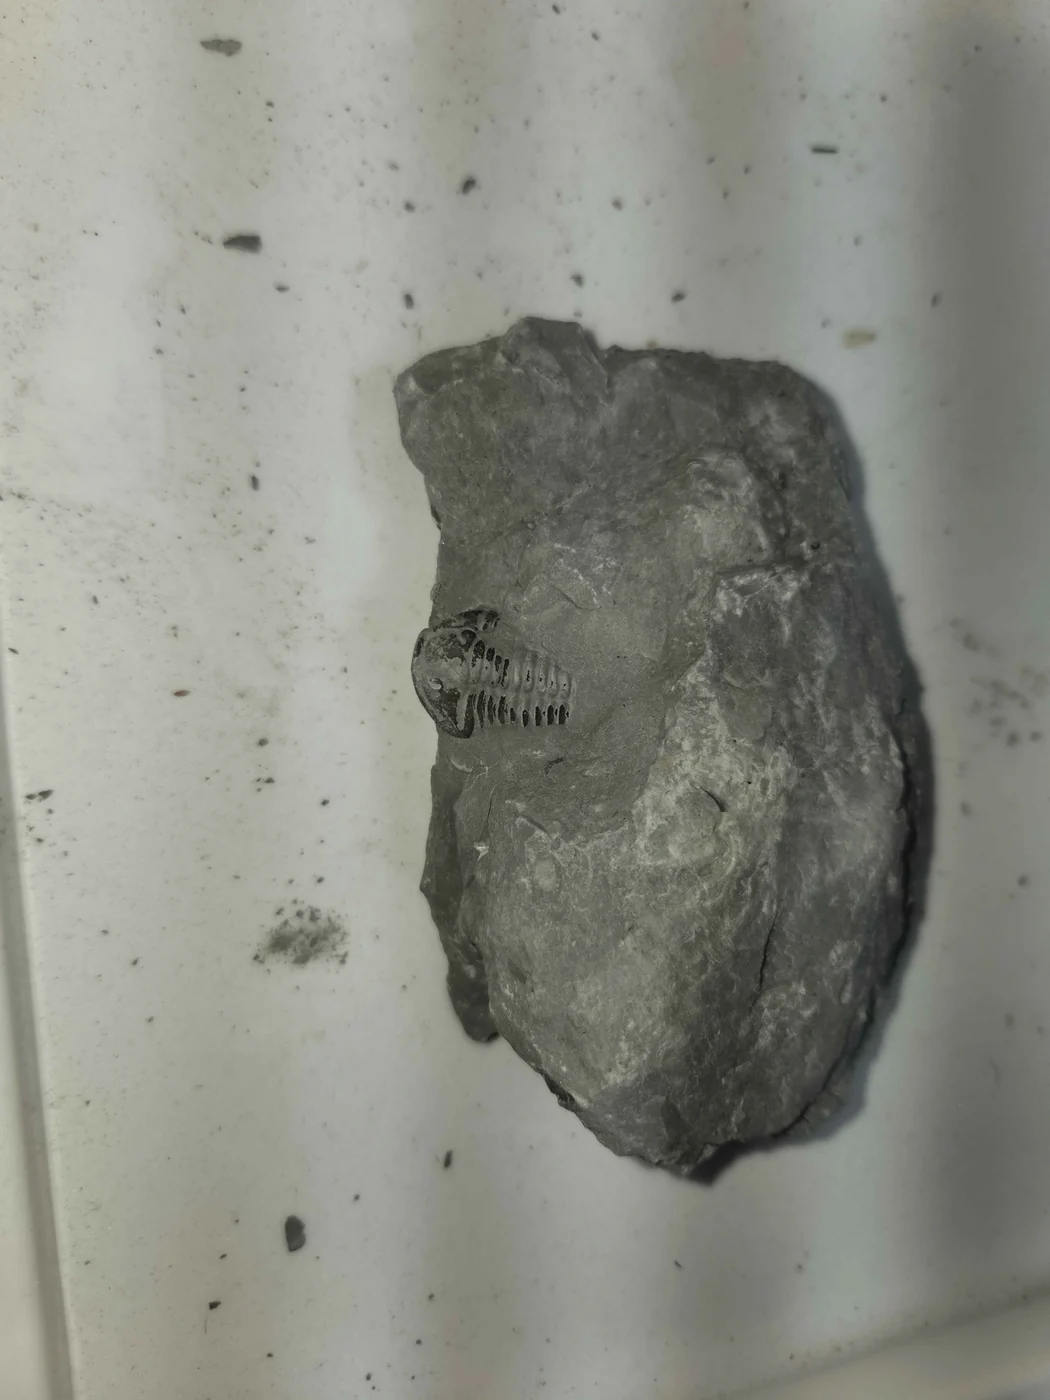
Another look before preparation
A second view of the raw nodule shows how much surrounding rock remains before preparation.
Read audio transcript
A second view of the raw nodule shows how much surrounding rock remains before preparation.
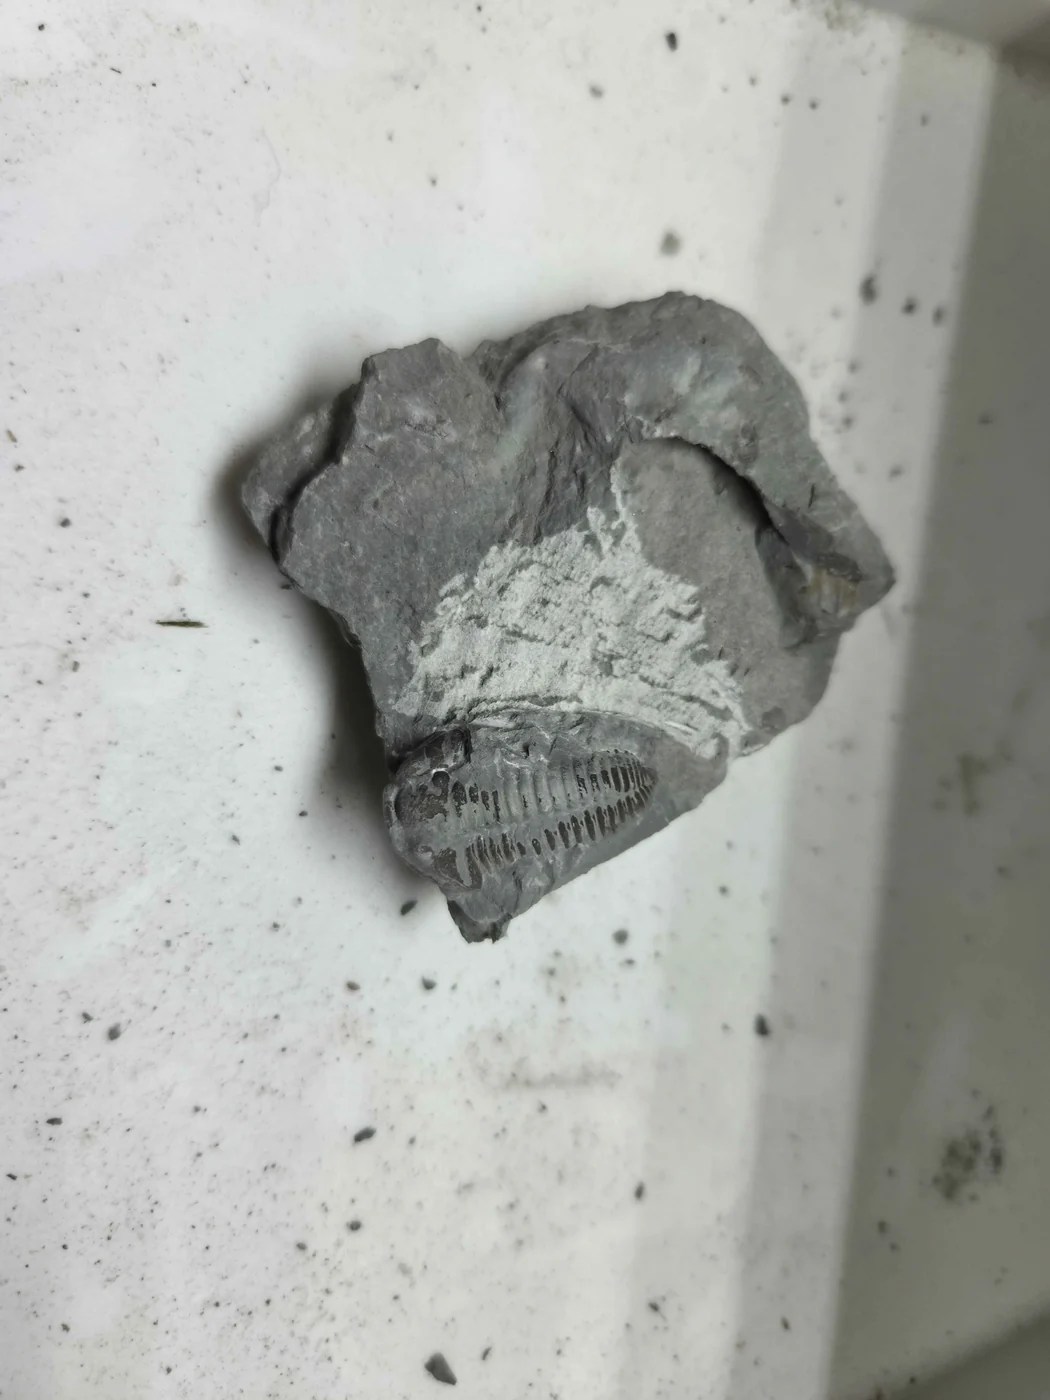
Opening up the matrix
I used an air scribe to remove surrounding matrix and expose more of the fossil.
Read audio transcript
I used an air scribe to remove surrounding matrix and expose more of the fossil.
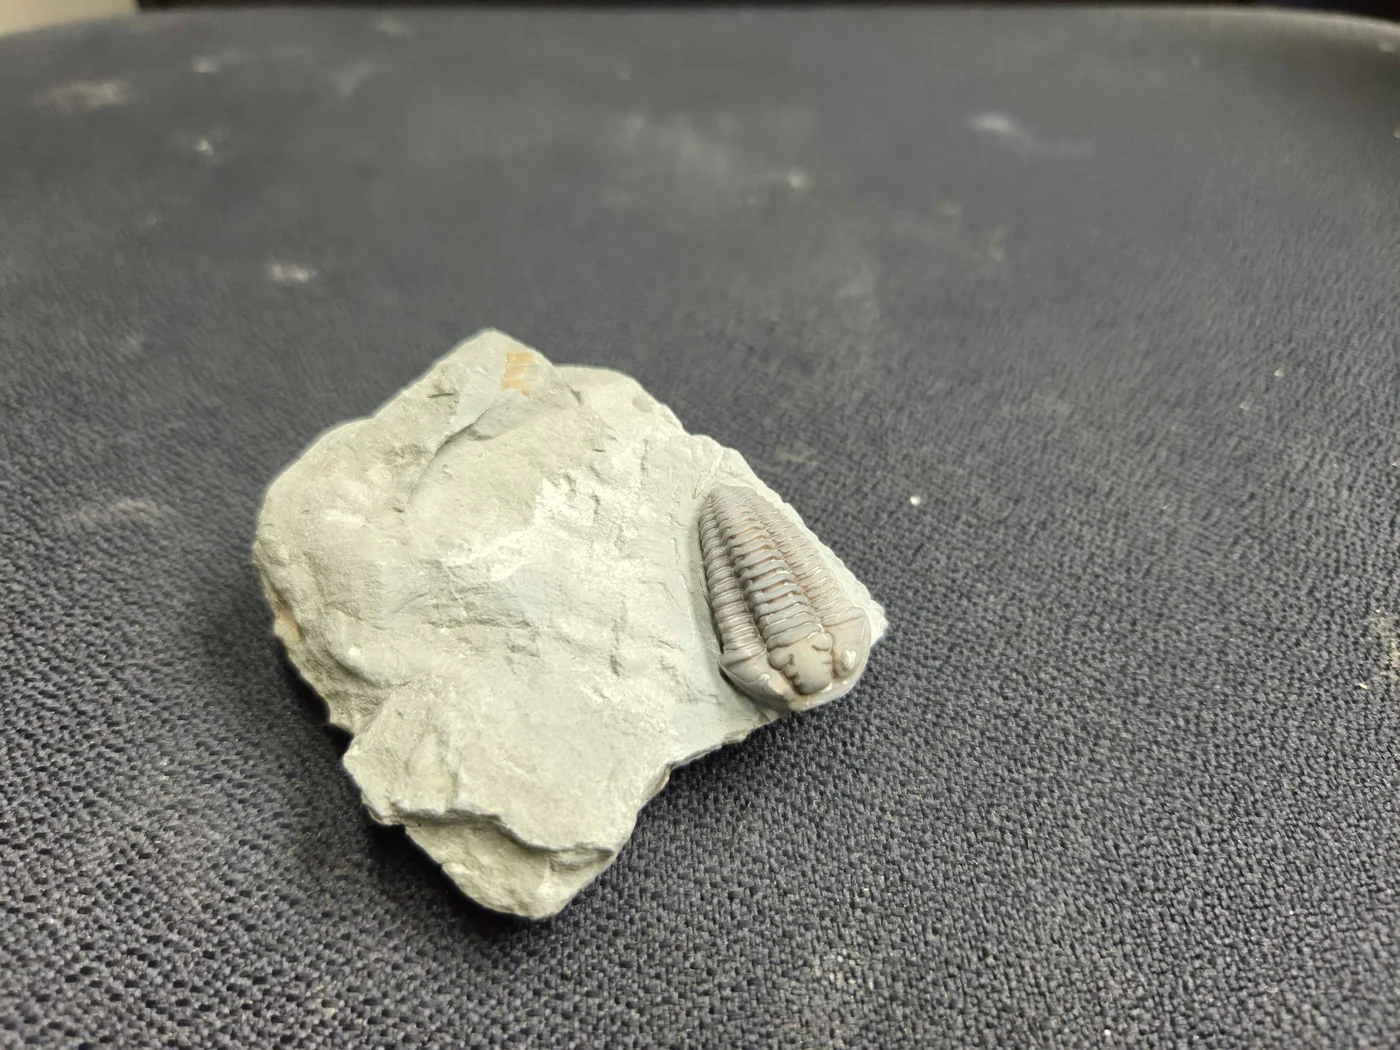
Working around the detail
After the air scribe, I used air abrasive to work on the remaining matrix around the exposed fossil.
Read audio transcript
After the air scribe, I used air abrasive to work on the remaining matrix around the exposed fossil.
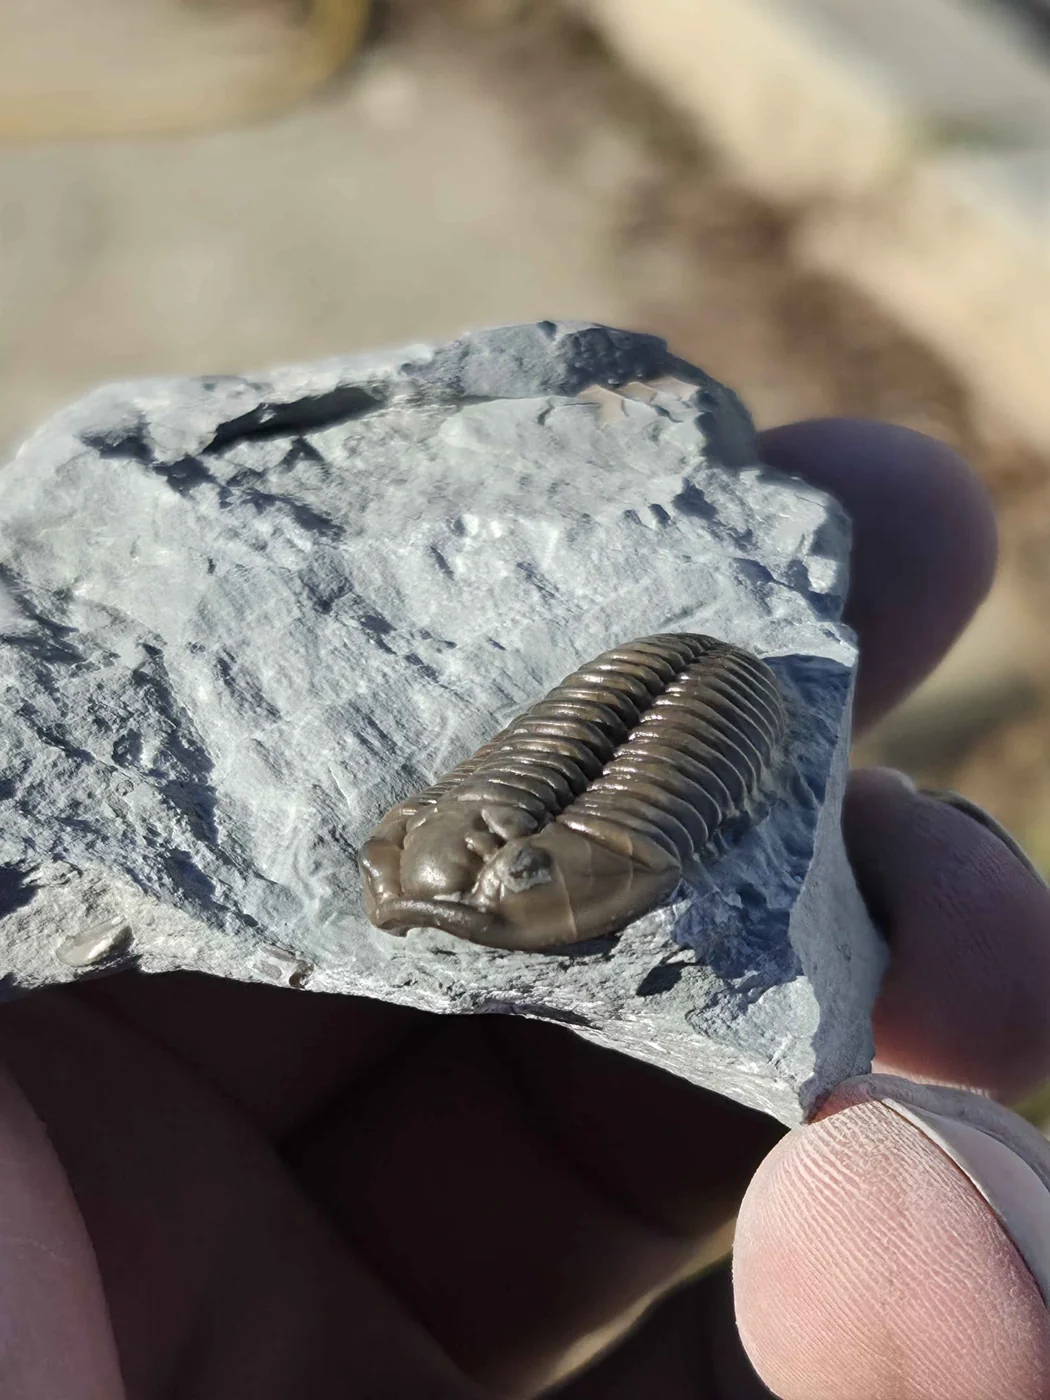
Finishing the surrounding rock
Between the air-abrasive stage and the finished fossil, I shaped the matrix with a rotary tool. I then landscaped it with more abrasive to erase the tooling marks. This photograph shows the finished result, not the tools in use.
Read audio transcript
Between the air-abrasive stage and the finished fossil, I shaped the matrix with a rotary tool. I then landscaped it with more abrasive to erase the tooling marks. This photograph shows the finished result, not the tools in use.
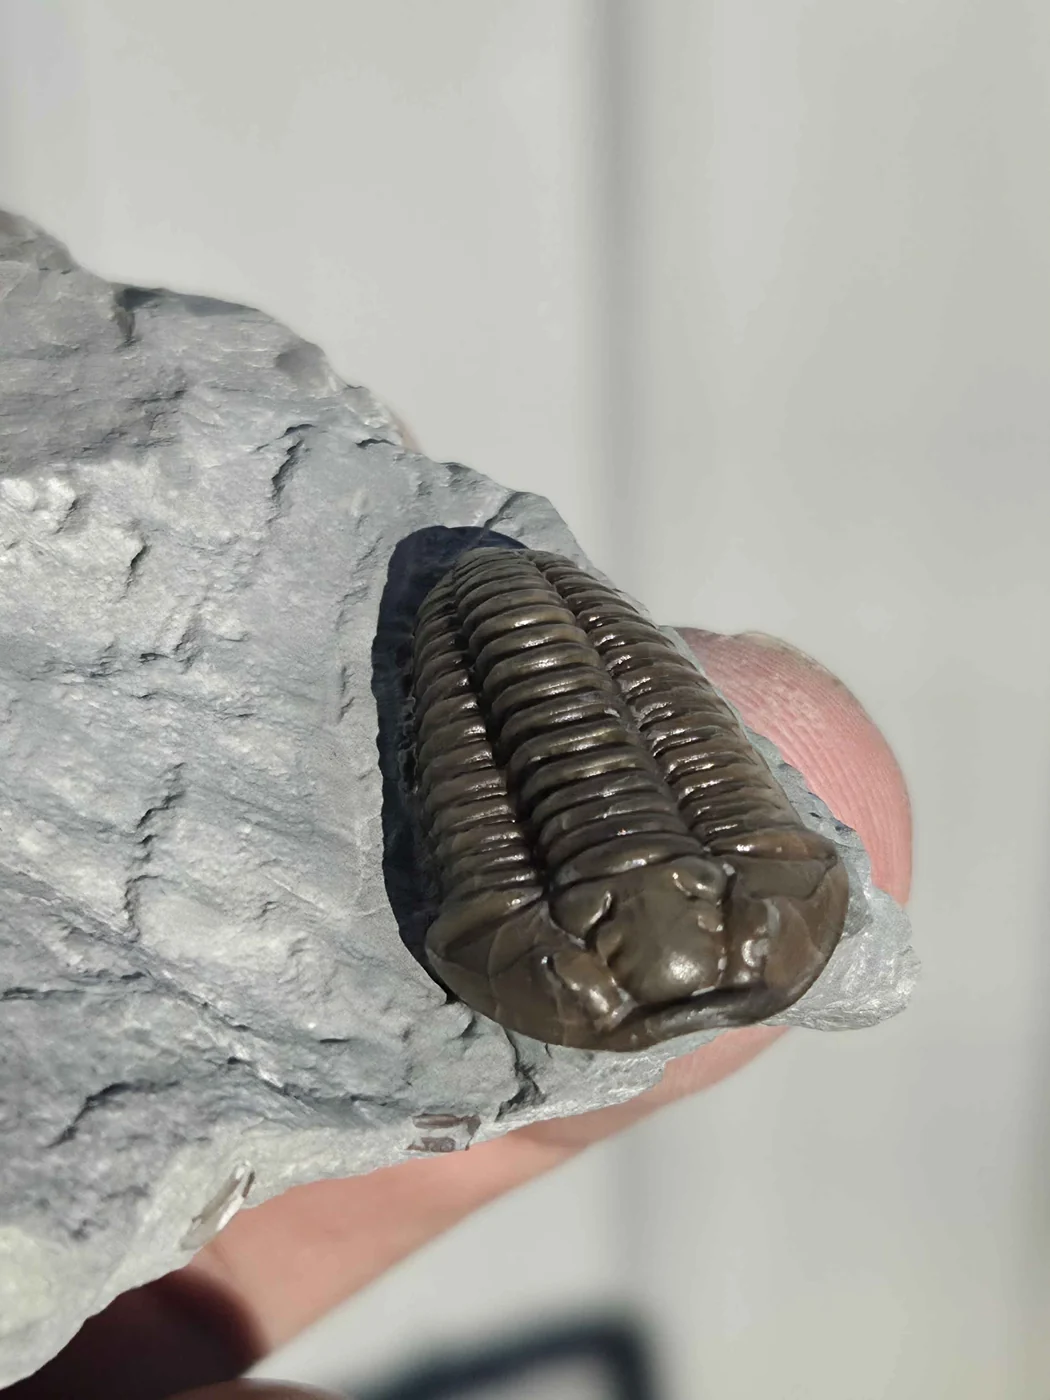
Why I prefer a satin finish
My preference is a satin acrylic finish. To me, its semi-gloss sheen gives the most realistic look and feel of a freshly split shale fossil. The sheen comes from the applied finish, rather than an untreated surface.
Read audio transcript
For the finish, I prefer a satin acrylic. That slight gloss and sheen remind me of a freshly split shale fossil. That's the look I'm going for. It's an applied finish, though, and I want that to be clear when you're looking at the specimen.
AI-generated narration using a cloned voice. Playback is optional.
Swipe or scroll sideways through the photographs. Different angles show the work without forcing the images into an overlay.
Notes, not noise.
The Mt. Orab Bed: Fauna and Evidence
The Sunset Member butter shale, repeated storm burial, and the difference between a Mt. Orab record and a regional possibility.
22 August 2026Eyes, Preservation and Identification
Condition and taxonomy answer different questions. A preservation grade cannot establish a species or a quarry occurrence.
19 July 2026Butter Shale: Preserve the Evidence
Why the layer, articulation and association matter alongside the prepared fossil.
Three rules
Measure, then name
Size, segment count and locality go in the first three lines. If a post cannot be understood without the story, the post is bad.
Show the details
I include the preparation, condition and provenance with each specimen.
No countdown pressure
Use the linked eBay listing to check availability and buy. Browsing this catalogue does not reserve stock.
